How to Use Adobe Media Encoder to Compress Video
by Christine Smith • 2021-11-16 15:07:04 • Proven solutions

Video compression is the need for the day. With video formats becoming more and more advanced, the detailing has improved manifolds, which have resulted in large file sizes. Viewing these videos on your PC or HD TV sets is definitely an awesome experience, but there is a lot of struggle when it comes to sharing and storing these files. So when you want to store several files, share them over Facebook, sent through email, or play over smartphones, compressing is the solution. You can opt for Wondershare Video Compressor (Wondershare UniConverter (originally Wondershare Video Converter Ultimate)), Handbrake compression, Adobe video compression, FFMpeg, or use other similar programs to shrink video files. Know in detail about the top 4 desktop video compression tools.
- 1. Best Video Compressor - Wondershare UniConverter (originally Wondershare Video Converter Ultimate)
- 2. Handbrake
- 3. FFmpeg
- 4. Adobe Media Encoder
1. Best Video Compressor - Wondershare UniConverter (originally Wondershare Video Converter Ultimate)
One of the best tools for all your videos related need is Wondershare UniConverter (originally Wondershare Video Converter Ultimate). This wonderful software allows compressing, converting, editing, as well as transferring media files. The program supports cropping, trimming, changing the file format to small size, and editing video file parameters for downsizing video files. Wondershare UniConverter (originally Wondershare Video Converter Ultimate) facilitates batch processing where several files can be compressed at a time. In addition to local files, the program also allows downloading online videos and then resizes them as per requirements. Transferring videos, editing them, and burning them to DVD are additional features of the software.
-
Shrink videos without losing video quality.
-
Supports more than 1000 video conversion formats to compress videos.
-
Crop, merge, rotate, and split videos within the program.
-
Reduce video file size by adjusting video parameters like frame rate, bitrate, resolution, etc.
-
90X faster conversion speed than other common converters.
-
Burn video to playable DVD with attractive free DVD templates.
-
Download or record videos from video sharing sites.
-
Versatile toolbox includes fixing video metadata, GIF maker, VR converter, and screen recorder.
-
Supported OS: Windows 10/8/7/XP/Vista, Mac OS 10.15 (Catalina), 10.14, 10.13, 10.12, 10.11, 10.10, 10.9, 10.8, 10.7, 10.6
Steps to compress video using Wondershare UniConverter (originally Wondershare Video Converter Ultimate):
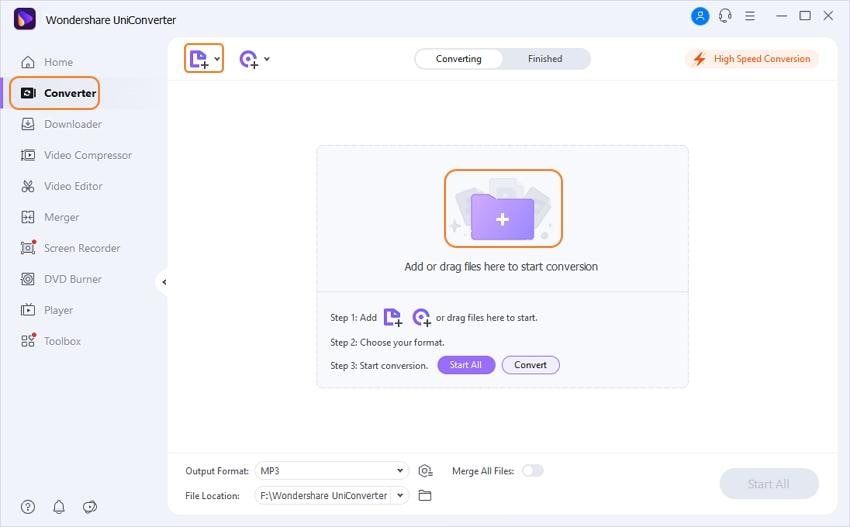
Step 1 Launch Wondershare UniConverter (originally Wondershare Video Converter Ultimate) and add video(s).
Install and then open the Wondershare software on your PC. Click +Add Files to browse and add local file(s) from your PC.
Step 2 Select file format, edit video parameters, or edit file.
There are multiple ways of optimizing video using this video compress:
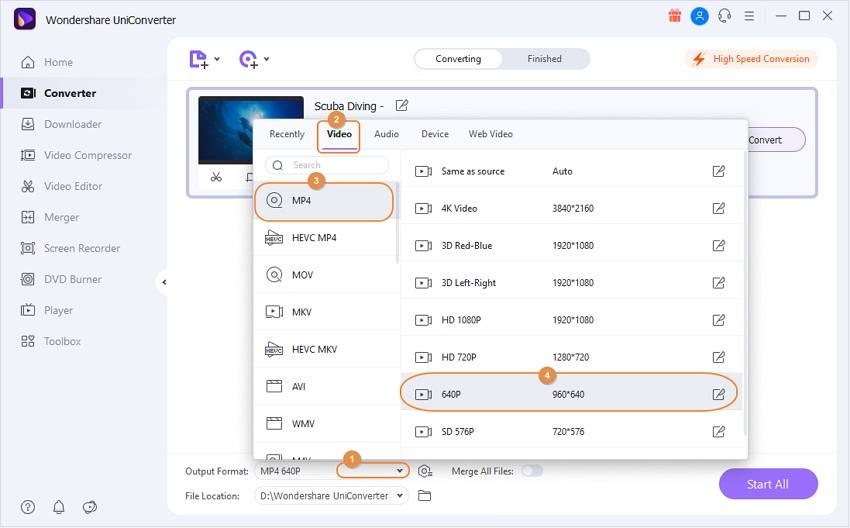
Method 1: Change file format
The simplest way to compress a file using the software is to select a small size format like MP4, FLV, WMV, etc. For doing so, click the drop-down menu beside Output Format and select from given formats under the Video tab. Select the desired resolution as well.
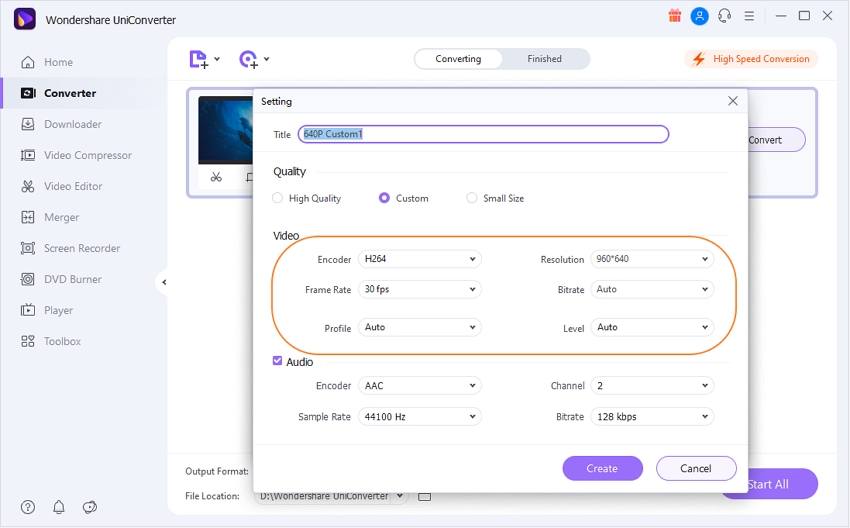
Method 2: Change video parameters
To change video parameters, click the Edit icon next to the resolution setting or click +Create Custom. A new popup window will open from where you can change the quality, frame rate, bitrate, and video resolution to reduce its size. Click Create to save the settings.
Method 3: Crop and trim videos
On the primary interface, click the Trim or Crop icon under the video thumbnail to edit them as desired.
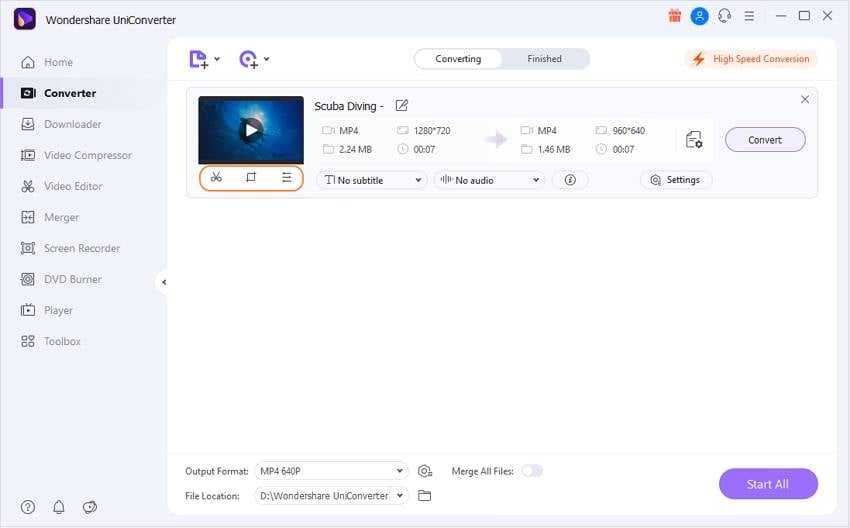
Step 3 Start video compression.
Once all the above settings are completed, preview the file size, and click Start All to start the process.

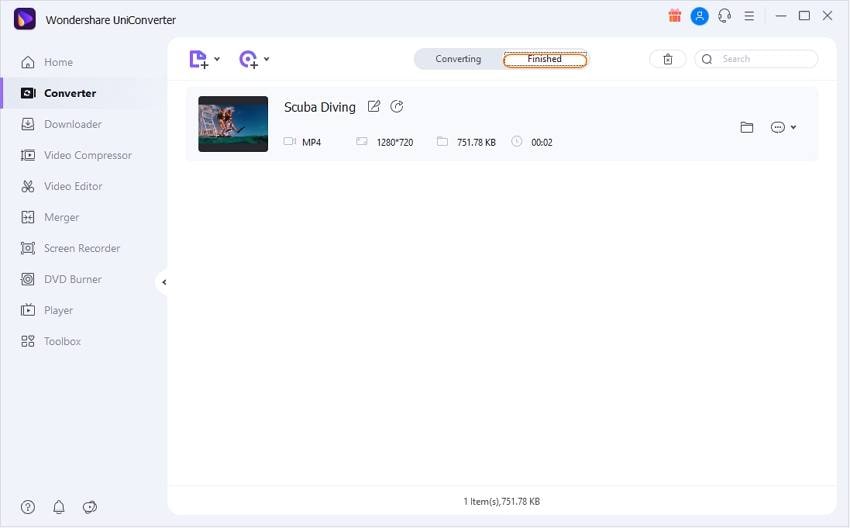
The compressed files can be managed through the Finished tab, or you can tap the Output icon at the bottom of the main interface to get the compressed video.
Pros:
- Supports more than 1000 file formats to compress.
- Enables to compress videos in batch.
- 30 times faster file compression speed.
- Multiple methods to compress videos.
- All-in-one tools: downloader, recorder, editor, DVD burner, and more.
Cons:
- Need registration and installation.
- Paid software with a free trial.
2. Handbrake
URL: https://handbrake.fr/
Handbrake is another popular tool that allows resizing videos. The free and open-source program is available for Windows, Mac, as well as Linux systems. Handbrake compression can be done by editing the videos' parameters manually or going with the presets. Handbrake reduces file size by changing the frame rate, bit rate, codec, file format, quality, and resolution. While using Handbrake to compress video, you can select MKV and MP4 as the output formats. Additional supported features include selecting the title, chapter, and range, batch scanning of files, adding subtitles, and others. How to compress a video using Handbrake, the following pointers will help you.
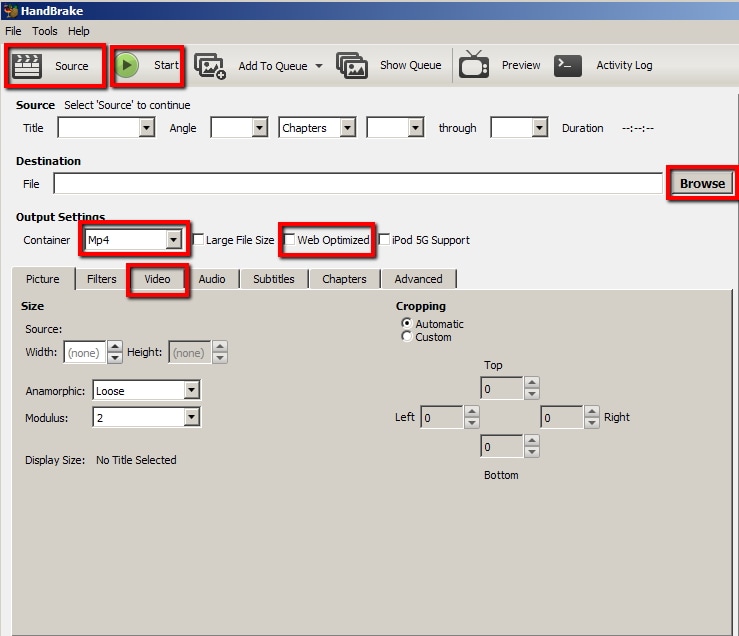
Steps to compress video with Handbrake:
Step 1. Download the program from http://www.handbrake.fr and open it on your PC.
Step 2. Click Source> Open File to browse and add a local video that you want to compress.
Step 3. Select Output settings of the file concerning the codec, quality, frame rate, bit rate, etc.
Step 4. Click the Start button to initiate the compression process.
Handbrake compress MP4 and other formats using the above simple steps.
Pros:
- The Handbrake file compressor is free to use the open-source program.
- It allows for creating videos in different chapters for long videos.
Cons:
- Only support MP4 and MKV as the output formats.
- The preset formats for devices are limited.
- Features like cropping, previewing, and others do not function very efficiently.
3. FFmpeg
URL: https://www.ffmpeg.org/
FFmpeg is a command-line tool for compressing videos and performing various other functions like changing the format, creating GIFs, changing quality, and extracting audio. FFmpeg is basically a collection of different projects that help in the handling of multimedia files. The tool works on different platforms and OS. The program facilitates changing the format, its quality, bit rate, frame rate, and size for resizing files. The process of resizing files takes place by running a command.
Steps to compress video using FFmpeg:
Step 1. Download FFmpeg on your PC from https://www.ffmpeg.org/download.html.
Step 2. On your PC, go to Run, type cmd, and press the Enter key. A command-line window will appear.
Step 3. At the command line window, type "cd\" and press enter. Next, type "cd FFmpegTool" to enter the FFmpegTool folder.
Step 4. Type desired function command at the window. For example, to resize a video file type – "ffmpeg -i yourvideoname.mp4 -s 640x480 -c:a copy resizedvideo.mp4".

Pros:
- A free, open-source tool that works very quickly.
- Major audio and video formats are supported.
- Support a wide range of filters and codecs.
Cons:
- Documentation is confusing and difficult to understand.
- Limited cross-platform support.
- For beginners, the tool is difficult to use.
4. Adobe Media Encoder
URL: https://www.adobe.com/in/products/media-encoder.html
Adobe Media Encoder is a powerful tool for managing media. The program works uniformly across all the applications. Media Encoder is a part of the video editing suite by Adobe and facilitates the encoding of the files to be played on different devices and players. The program works as an efficient compressor and a converter supporting an array of input and output formats. Over 150 presets for popular devices are also supported by the tool.
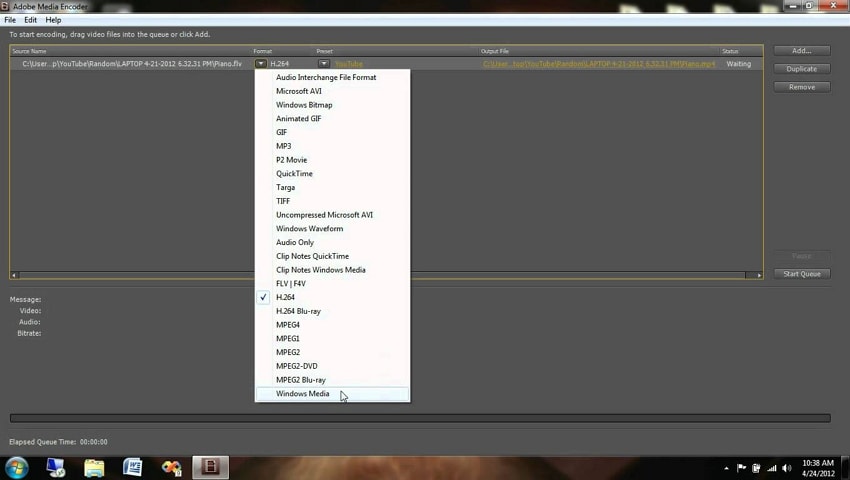
Steps for Adobe video compression:
Step 1. Open Adobe Media Encoder on your PC and drag the file(S) you want to compress. You can also add the files through the Media browser.
Step 2. Select a preset that matches your requirements. Adobe media encoder YouTube settings are also present for quick compression. You can also do the manual Adobe media encoder settings.
Step 3. Click Start Queue to start the compression process. The ENCODING window will show the progress of the task.
Pros:
- Supports an array of input and output formats.
- More than 150 presets for devices.
- Allows two-pass encoding.
Cons:
- It does not allow to set multiple output modules for the one render item.
This article has learned the guide for video compression using UniConverter, compress mp4 with Handbrake, use FFmpeg, or Adobe Video Compression. Generally speaking, the above guide will resolve all listed queries most simply.
Free Download Free Download
How to Use Adobe Media Encoder to Compress Video
Source: https://videoconverter.wondershare.com/compress/using-handbrake-ffmpeg-adobe-to-compress-video.html
0 Response to "How to Use Adobe Media Encoder to Compress Video"
Post a Comment